


How do you pick a region when your users are located in multiple regions? Host Shiny with Fly.io to auto-scale near your users.
I introduced Fly.io as a hosting platform for Shiny apps in a previous post. In that post, I only scratched the surface of what you can do with Fly.io. Here I continue with setting up a custom domain with HTTPS and exploring how to scale the app in multiple regions.
So what is the big deal with multiple regions? To put this feature into context, here is where the servers of other hosting platforms are located (cloud provider in parenthesis):
- Shinyapps.io: US-East (AWS)
- Heroku, common runtime: US-East, EU-West (AWS)
- Heroku, private space: Dublin, Frankfurt, Oregon, Sydney, Tokyo, Virginia (AWS)
- DigitalOcean App Platform: Amsterdam, Frankfurt, New York, and San Francisco (DigitalOcean)
You can select one from these upon deployment. Once you change replication from 1 to multiple instances, those will be also deployed in the same region.
If performance really matters for your app and your audience is located across the globe, Fly.io might work well for you. For web applications, Fly.io provides something like content delivery networks (CDNs) for static web pages. CDNs load HTML assets (JavaScrip, CSS) from a server closest to you.
The application delivery in the Case of Fly works similarly: the system makes sure users are directed to the geographically closest location to ensure performance is as best as can be. Of course, with real-time applications, this is much harder to do than with static files.
The platform works out which region an application should be running in based on the incoming connection from a client. It then starts the application in that region and completes the connection. This means that an application does not need to know which region it is running in. – Fly Docs
At the time of writing, Fly lists the following data centers: Amsterdam, Atlanta, Paris, Dallas, Parsippany, Frankfurt, Sao Paulo, Hong Kong, Ashburn, Los Angeles, London, Chennai, Tokyo, Chicago, Santiago, Seattle, Singapore, Sunnyvale, Sydney, Toronto, Bathurst.
You might notice a really good representation in the Asia–Pacific region and in South America that are not well served by the other PaaS options (Heroku private spaces are really expensive!).
This application delivery network idea also implies that your app is available from multiple regions. So scaling becomes an integral part of the system. Let's dive right in!
Prerequisites
We will follow the app described in the previous post and in the analythium/fly-shiny GitHub repository. Change directory into the project. It should have the README.md and fly.toml inside. Follow instructions from the previous post to sign up to Fly.io and install the flyctl command-line utility.

Launch an app
We can pick it up from where we left off: define the app's name and pull the docker image if not present on your local machine. Note the app name will be different for you, that's why it is in an environment variable – so you can change it in one place. The app name should be the same as the app value in the fly.toml file:
export APP_NAME="cool-smoke-1972" # put here you app name
export DOCKER_IMAGE="analythium/shinyproxy-demo:latest"
docker pull $DOCKER_IMAGE
Next, we launch the app by specifying the app name and the image tag. Make sure you are in the same directory where the previously created fly.toml file is located. Follow the prompts to set up which account and region the app should be deployed to:
## use previous fly.toml file and image
flyctl launch --name $APP_NAME --image $DOCKER_IMAGE

# An existing fly.toml file was found for app cool-smoke-1972
# ? Would you like to copy its configuration to the new app? Yes
# Creating app in /Users/Peter/dev/fly-shiny
# Using image analythium/shinyproxy-demo:latest
# Selected App Name: cool-smoke-1972
# ? Select organization: Analythium (analythium)
# ? Select region: yyz (Toronto, Canada)
# Created app cool-smoke-1972 in organization analythium
# Wrote config file fly.toml
Finally, you can deploy the app. This will validate the configuration, push the Docker image to the Fly registry:
flyctl deploy

# Deploying cool-smoke-1972
# ==> Validating app configuration
# --> Validating app configuration done
# Services
# TCP 80/443 ⇢ 3838
# Searching for image 'analythium/shinyproxy-demo:latest' locally...
# image found: sha256:b11b410020...
# ==> Pushing image to fly
# The push refers to repository [registry.fly.io/cool-smoke-1972]
# e86054b4a909: Pushed
# ...
e749bc5a8d9b: Pushed
# deployment-1637303180: digest: sha256:33b6331910465f...
# --> Pushing image done
# Image: registry.fly.io/cool-smoke-1972:deployment-1637303180
# Image size: 1.2 GB
# ==> Creating release
# Release v2 created
#
# You can detach the terminal anytime without stopping the deployment
# Monitoring Deployment
#
# 1 desired, 1 placed, 1 healthy, 0 unhealthy [health checks: 1 total, 1 passing]
# --> v0 deployed successfully
In the end, you will have your app available at the URL https://$APP_NAME.fly.dev. Notice that it is served over HTTPS:

Setting up a custom domain
It is recommended to use an A or AAAA record if you set up an apex domain (like example.com). Get the IPv4 and IPv6 addresses and add those to your DNS as described in the Fly docs:
flyctl ips list

# TYPE ADDRESS             REGION CREATED AT
# v4   213.188.220.171     global 5m47s ago
# v6   2a09:8280:1::6:11cc global 5m47s ago
For a subdomain (e.g. app.example.com), you can set an A/AAAA record, or add a CNAME. I am showing here how to add the CNAME in your DNS record (I am using Google Domains):
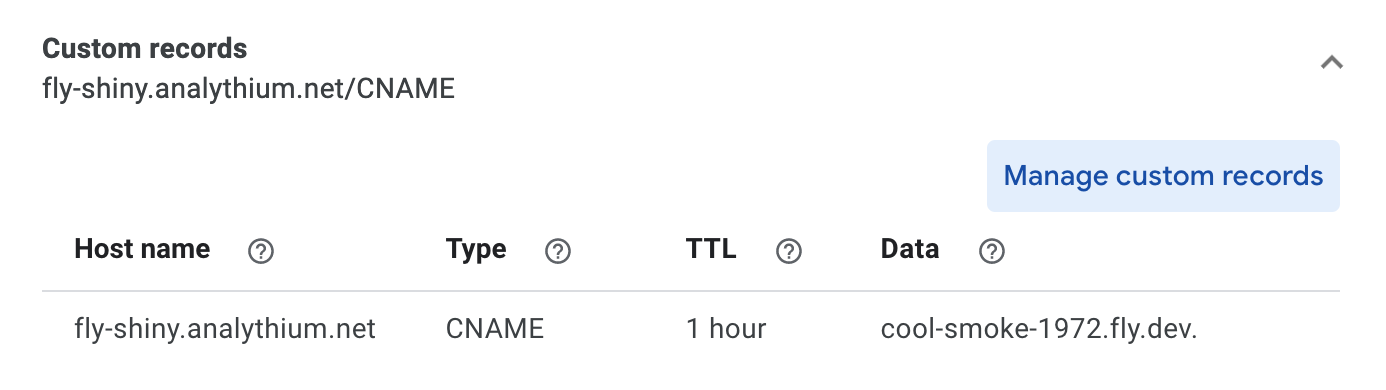
Give a few minutes to the name servers. Once the records are propagated, you should be able to access the app at your custom (sub)domain:
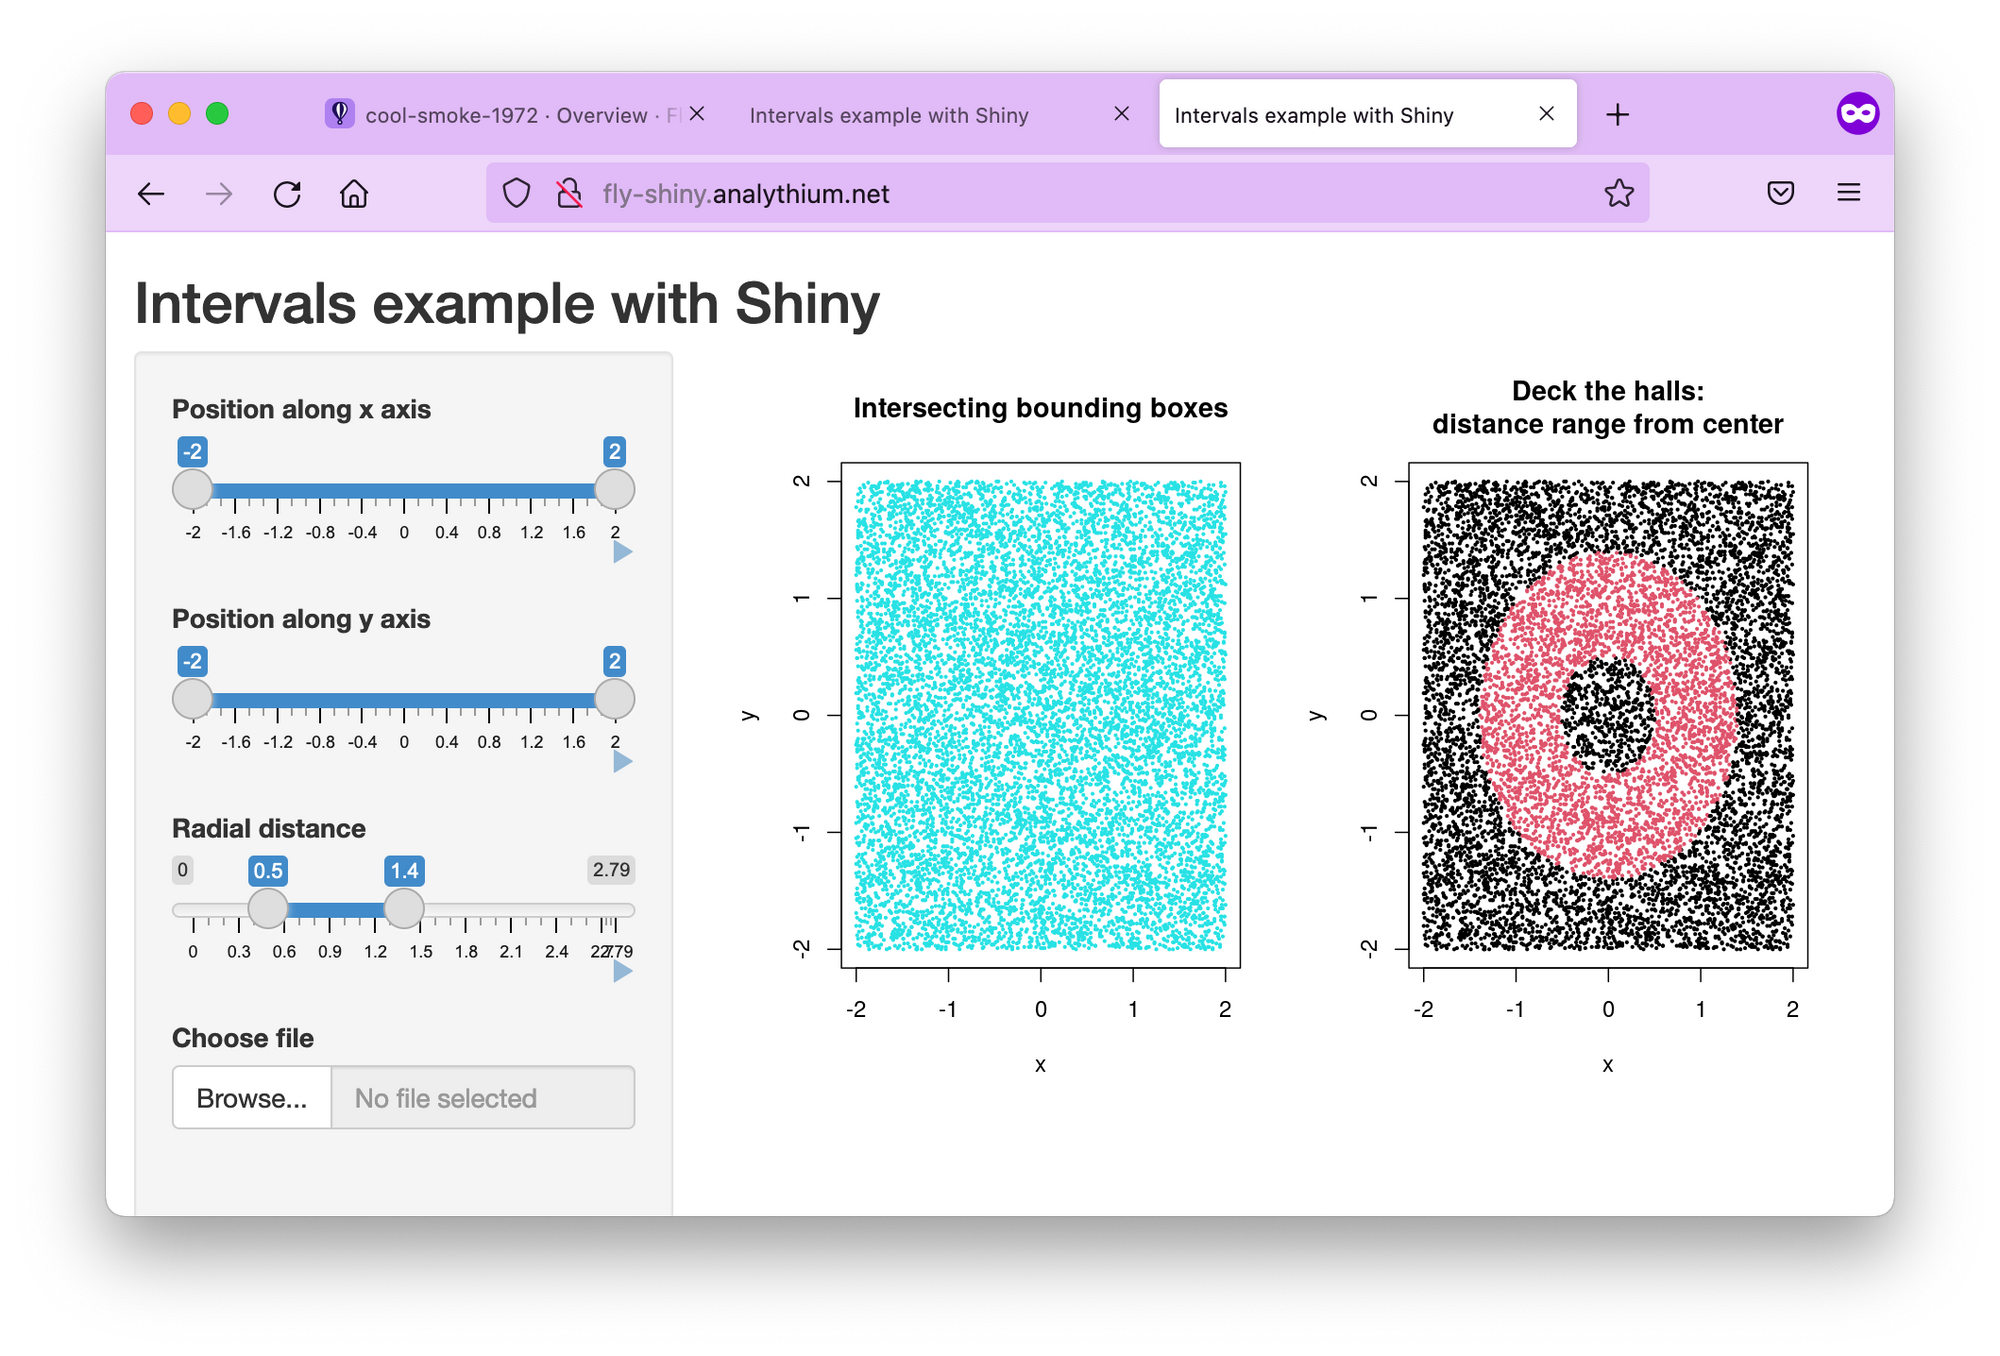
Notice the crossed lock symbol indicating that the app is served over HTTP.
Adding TLS/SSL certificate
Let's add security (TLS/SSL) certificates by following the Fly docs. I export here the custom domain name, you can change it to yours:
export DOMAIN_NAME="fly-shiny.analythium.net" # change domain here

flyctl certs create $DOMAIN_NAME

# Your certificate for fly-shiny.analythium.net is being issued.
# Status is Awaiting certificates.
Wait for a bit, issuing certificates might take a couple of minutes. Once it is done, you should see that a certificate has been issued:
flyctl certs show $DOMAIN_NAME
# The certificate for fly-shiny.analythium.net has been issued.
# Hostname = fly-shiny.analythium.net
# DNS Provider = googledomains
# Certificate Authority = Let's Encrypt
# Issued = ecdsa,rsa
# Added to App = 24 minutes ago
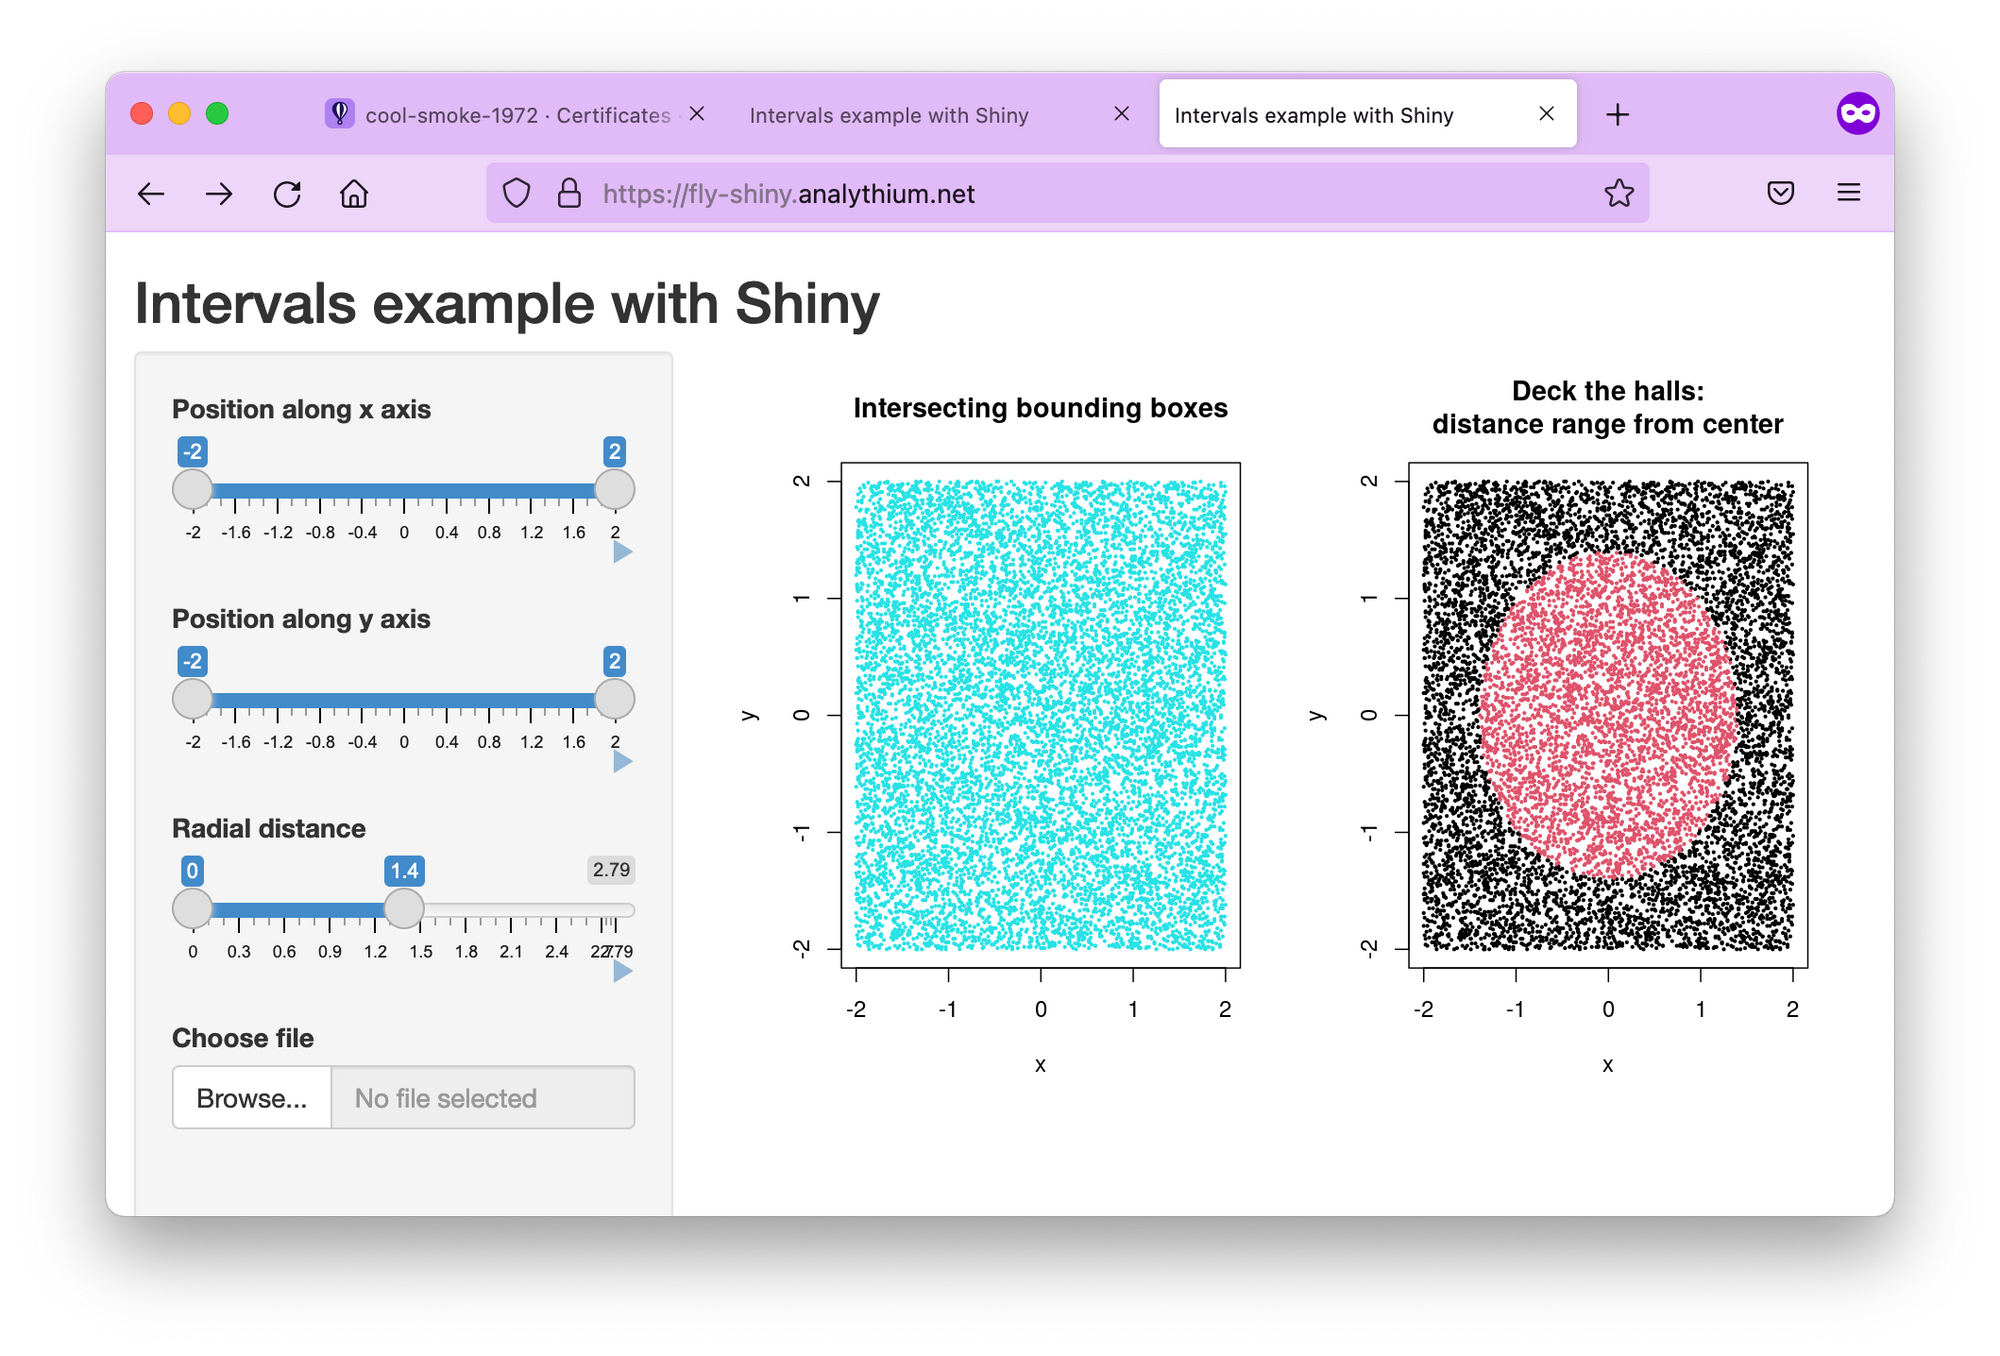
# Source = flyIf you visit your app URL now, the lock symbol looks good, the Shiny app is now served over HTTPS:
Regions
Use the flyctl to list the regions for the deployed app. Depending on your location, you will see different regions listed. I deployed the app from Toronto (yyz). If you are in doubt about what the 3-letter codes mean, these are airport codes, so just search for them.
flyctl regions list

# Region Pool:
# yyz
# Backup Region:
# bhs
# ewr
My backup regions are ewr (Parsippany, NJ US) and bhs Bathurst, Australia (this one I had to look up because it must be so recent that it was not listed in the Fly docs).
If for any reason, the app can't be deployed in Toronto, Fly will try to spin it up in one of the backup regions. You can build your own region pool. For example, flyctl regions add ord cdg would add Chicago and Paris to the region pool:
flyctl regions add ord cdg

# Region Pool:
# cdg
# ord
# yyz
# Backup Region:
# ams
# bhs
# ewr
# lhr
# vin
Use flyctl regions remove ord to remove ord from the region pool.
Scaling
Once you defined the regions where you want your apps to run, it is time to set how many instances your app will have. But when do you need a new instance and what is an instance in this case?
Instances and concurrency
Fly.io uses a virtualization technology called Firecracker microVMs to run multi-tenant container services. So an instance is a microVM. Think of it as a portion of a shared virtual CPU and 256 MB memory units. These units are scaled up and down.
In your fly.toml configuration file you can find a section about concurrency with the following defaults:
...
  [services.concurrency]
    hard_limit = 25
    soft_limit = 20
    type = "connections"
...
This concurrency setting determines the microVM capacity. The default is 20 concurrent connections. When a user connects, the request is sent to the nearest microVM with capacity. If the existing VMs are at capacity, Fly launches more in the busiest regions. Idle microVMs are shut off. The room between the soft and hard limits gives time for new instances to be brought to life.
Scale count
The scale count is the number of instances. A scale count of 1 (default) means that 1 instance of the app is running in 1 of the regions in the region pool. Scale count refers to horizontal scaling.
You can increase the scale count with the flyctl scale count command. flyctl scale count 2 tells us to run 2 instances of your application.
You can see your current scaling parameters with flyctl scale show:
flyctl scale show

# VM Resources for cool-smoke-1972
#         VM Size: shared-cpu-1x
#       VM Memory: 256 MB
#           Count: 2
#  Max Per Region: Not set
The scaled app is placed in different regions in the region pool. Use the flyctl status command to list instances and which regions they are running in:
flyctl status

# App
#   Name     = cool-smoke-1972
#   Owner    = analythium
#   Version  = 3
#   Status   = running
#   Hostname = cool-smoke-1972.fly.dev
#
# Instances
# ID       PROCESS VERSION REGION DESIRED STATUS  HEALTH CHECKS      RESTARTS CREATED
# 535327bc app     3       yyz    run     running 1 total, 1 passing 0        3m7s ago
# 0c0bd76e app     3       cdg    run     running 1 total, 1 passing 0        4h55m ago
Scaling virtual machines
The physical servers that the microVM instances are running on have 8–32 CPU cores and 32–256 GB of RAM. Multiple virtual machines (VMs) share the same physical box. The number of cores and amount of memory available in the virtual machine can be set for all application instances using the flyctl scale vm command.
flyctl platform vm-sizes

# NAME             CPU CORES MEMORY
# shared-cpu-1x    1         256 MB
# dedicated-cpu-1x 1         2 GB
# dedicated-cpu-2x 2         4 GB
# dedicated-cpu-4x 4         8 GB
# dedicated-cpu-8x 8         16 GB
You can change the type of your VMs by adding the required size name to fly scale vm or using the fly scale memory to directly set the VM's memory allocation. This type of scaling is referred to as vertical scaling.
Autoscaling
Autoscaling means that the Fly system will create at least the minimum number of application instances across the regions in your region pool. New instances will be created based on traffic up to the maximum count.
By default, autoscaling is disabled and scale count is in effect. There are two types of auto-scaling models: Standard and Balanced. Here is what the Fly docs say:
- Standard: Instances of the application, up to the minimum count, are evenly distributed among the regions in the pool. They are not relocated in response to traffic. New instances are added where there is demand, up to the maximum count.
- Balanced: Instances of the application are, at first, evenly distributed among the regions in the pool up to the minimum count. Where traffic is high in a particular region, new instances will be created there and then, when the maximum count of instances has been used, instances will be moved from other regions to that region.
The command flyctl autoscale standard will turn on the Standard autoscaling plan. If you want the Balanced plan with min/max counts of 3 and 5, use flyctl autoscale balanced min=3 max=10. The command flyctl autoscale disable will disable autoscaling.
When you are done, use flyctl destroy $APP_NAME to destroy the deployed application. Don't forget to remove the A or CNAME record from your DNS settings too.
Session affinity
When there are multiple instances of the same app running (scale count >1), load balancing is needed to distribute the workload among the server processes. Without so-called "session affinity" (or "sticky sessions"), requests are sent to the instance that is next in line.

Problems with this type of load balancing can arise when the internet connection is severed for some reason, e.g. due to poor cell coverage. If saving the users' state is important for the app to work, e.g. the user uploads files etc., having no session affinity won't be ideal.
When you bump up your scale count, we’ll place your app in different regions (based on your region pool). If there are three regions in the pool and the count is set to six, there will be two app instances in each region. - Fly.io docs
Luckily, according to this thread, we can place instances in different regions to make sure traffic is only going to the closest instance. So when you increase the scale count (flyctl scale count), make sure you have the matching number of regions set up first (flyctl regions add).
If your app needs session affinity, check this GitHub repository for a test application to use to make sure everything is working as expected:
 analythium
Conclusions
If you expect surges in your app usage, the straightforward autoscaling capabilities of Fly will set this PaaS option apart from other platform offerings. Once your Shiny app is in a container, you are only a few commands away from a multi-region setup that dynamically responds to demand.
You might think this is an unlikely scenario of most shiny apps, but you could be surprised how often developers and researchers need to find a way to serve surge traffic. Such cases can happen after meetings and conferences. With Shiny's popularity on the rise, it is best to keep this option ready. You never know if your app will be the next viral sensation!
Further reading
- Fly docs on SSL and custom domains
- Continuous Deployment with Fly and GitHub Actions
- Scaling and autoscaling
- Fly regions