


Shiny for Python brings easy interactivity to web applications that build on the data and scientific stack of Python. Containerizing Py-Shiny apps is the next step towards deployment to a wide array of hosting options, including static hosting.
Shiny is a framework that makes it easy to build interactive web applications. Shiny was introduced 10 years ago as an R package. In his 10th anniversary keynote speech, Joe Cheng announced Shiny for Python at the 2022 RStudio Conference. Python programmers can now try out Shiny to create interactive data-driven web applications. Shiny comes as an alternative to other frameworks, like Dash, or Streamlit.
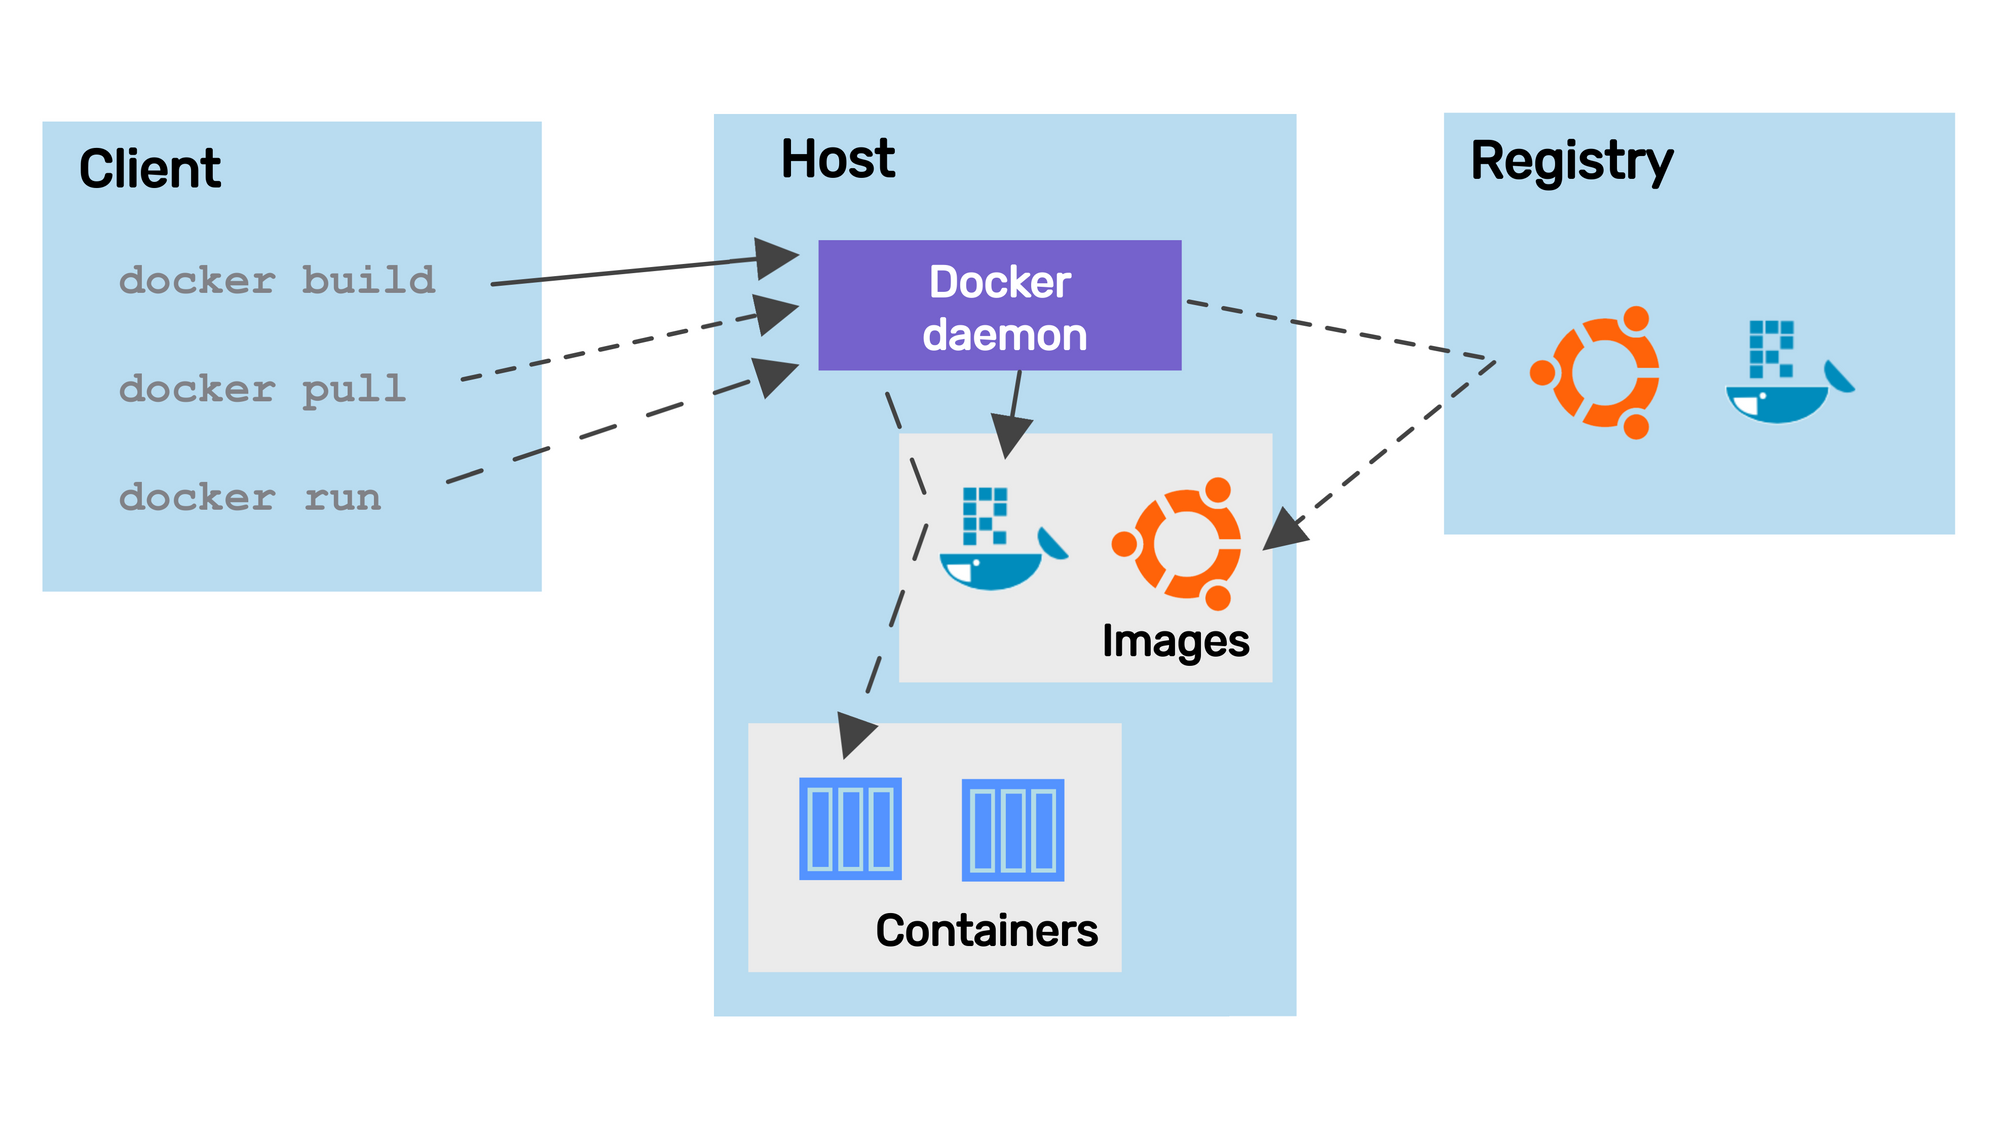
Similarly to R Shiny applications, Shiny for Python can be deployed using RStudio Connect, Shiny Server Open Source, and Shinyapps.io. Alternative hosting options – that the Hosting Data Apps website is dedicated to – require the Python Shiny app to run inside a container. In this post, we review how to use Docker to containerize a Shiny for Python app.
Shiny app template
We follow the Get started guide (see also the install guide). You can install Shiny with pip or conda. Here we will use pip. The following commands generate the app file that we will use:
pip install shiny
shiny create app
shiny run --reload app/app.py

# INFO:     Will watch for changes in these directories: ['/Users/Username/app']
# INFO:     Uvicorn running on http://127.0.0.1:8000 (Press CTRL+C to quit)
# INFO:     Started reloader process [57404] using StatReload
# INFO:     Started server process [57406]
# INFO:     Waiting for application startup.
# INFO:     Application startup complete.
Go to http://127.0.0.1:8000 in your browser to try the app displaying a slider and a text output returning double of the slider input value (N=n of course):
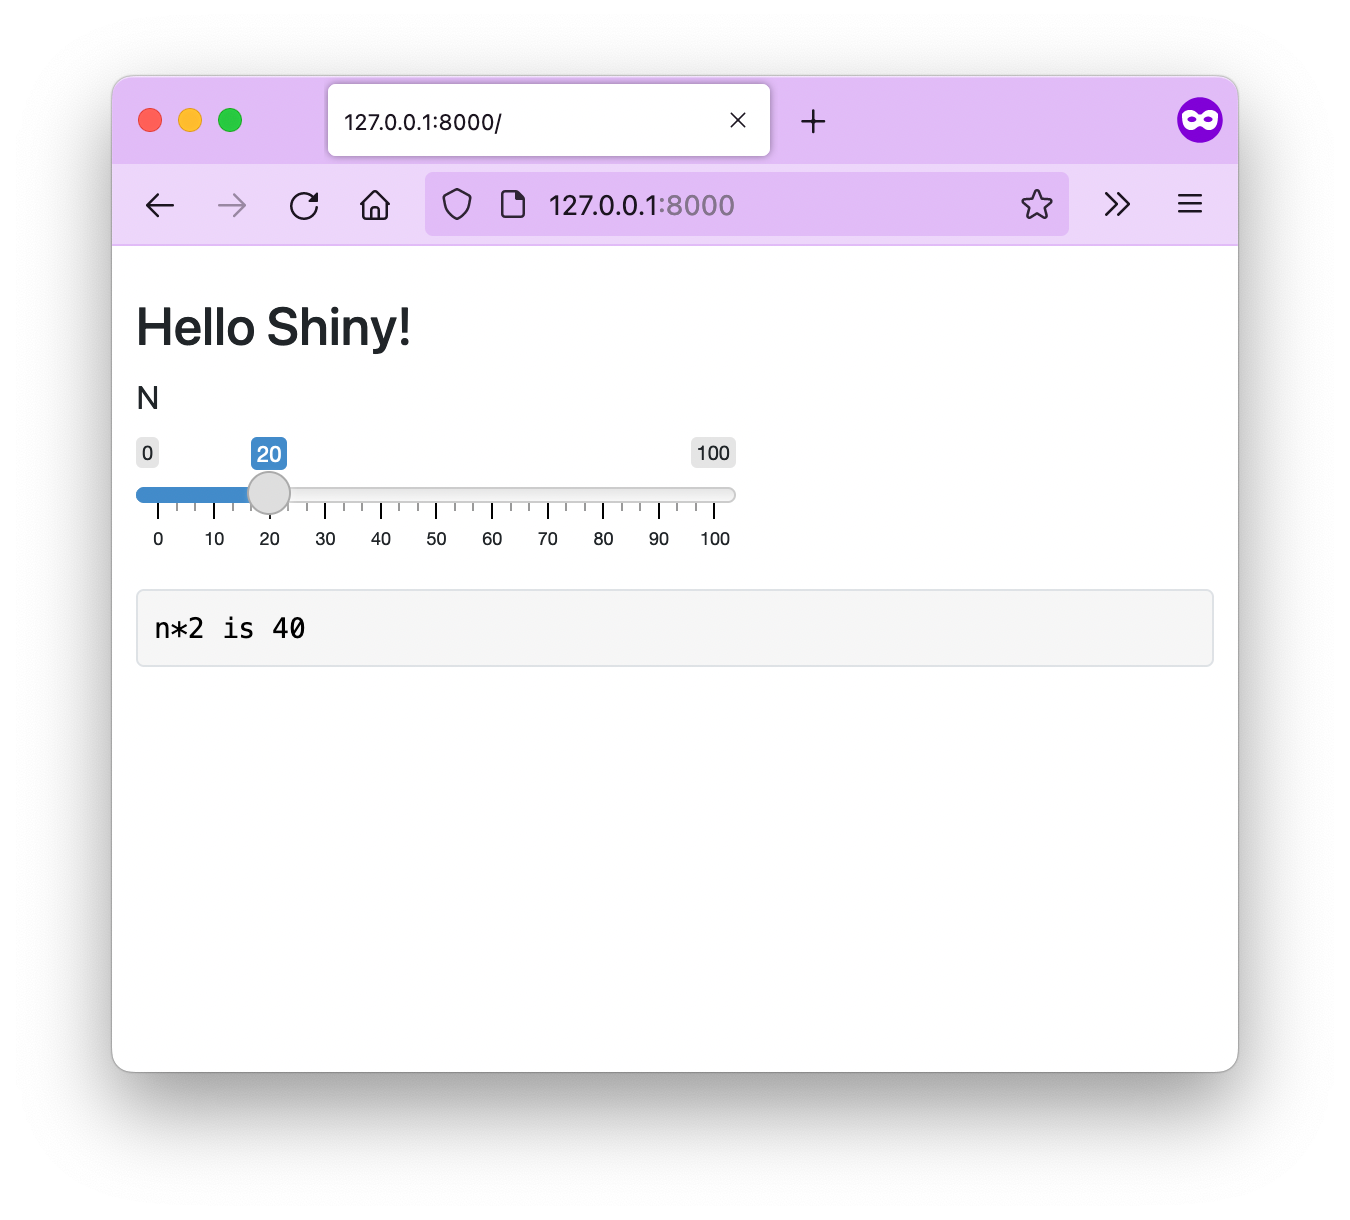
Use Ctrl+C to quit the app.
Example app with plot
We will use the app with plot example. Open the app/app.py file in a text editor and copy the following contents into it:
from shiny import App, render, ui
import numpy as np
import matplotlib.pyplot as plt

app_ui = ui.page_fluid(
    ui.h2("Histogram with Shiny for Python!"),
    ui.layout_sidebar(
        ui.panel_sidebar(
            ui.input_slider("n", "N", 0, 100, 20),
        ),
        ui.panel_main(
            ui.output_plot("plot"),
        ),
    ),
)


def server(input, output, session):
    @output
    @render.plot(alt="A histogram")
    def plot():
        np.random.seed(19680801)
        x = 100 + 15 * np.random.randn(437)
        plt.hist(x, input.n(), density=True)


app = App(app_ui, server, debug=True)
Create the file app/requirements.txt in the same directory as the app.py with the following contents:
shiny>=0.2.7
numpy>=1.23.3
matplotlib>=3.6.0
Now use pip install --no-cache-dir --upgrade -r app/requirements.txt to install the remaining packages. Then load the app again with shiny run --reload app/app.py and visit http://127.0.0.1:8000 in your browser again.
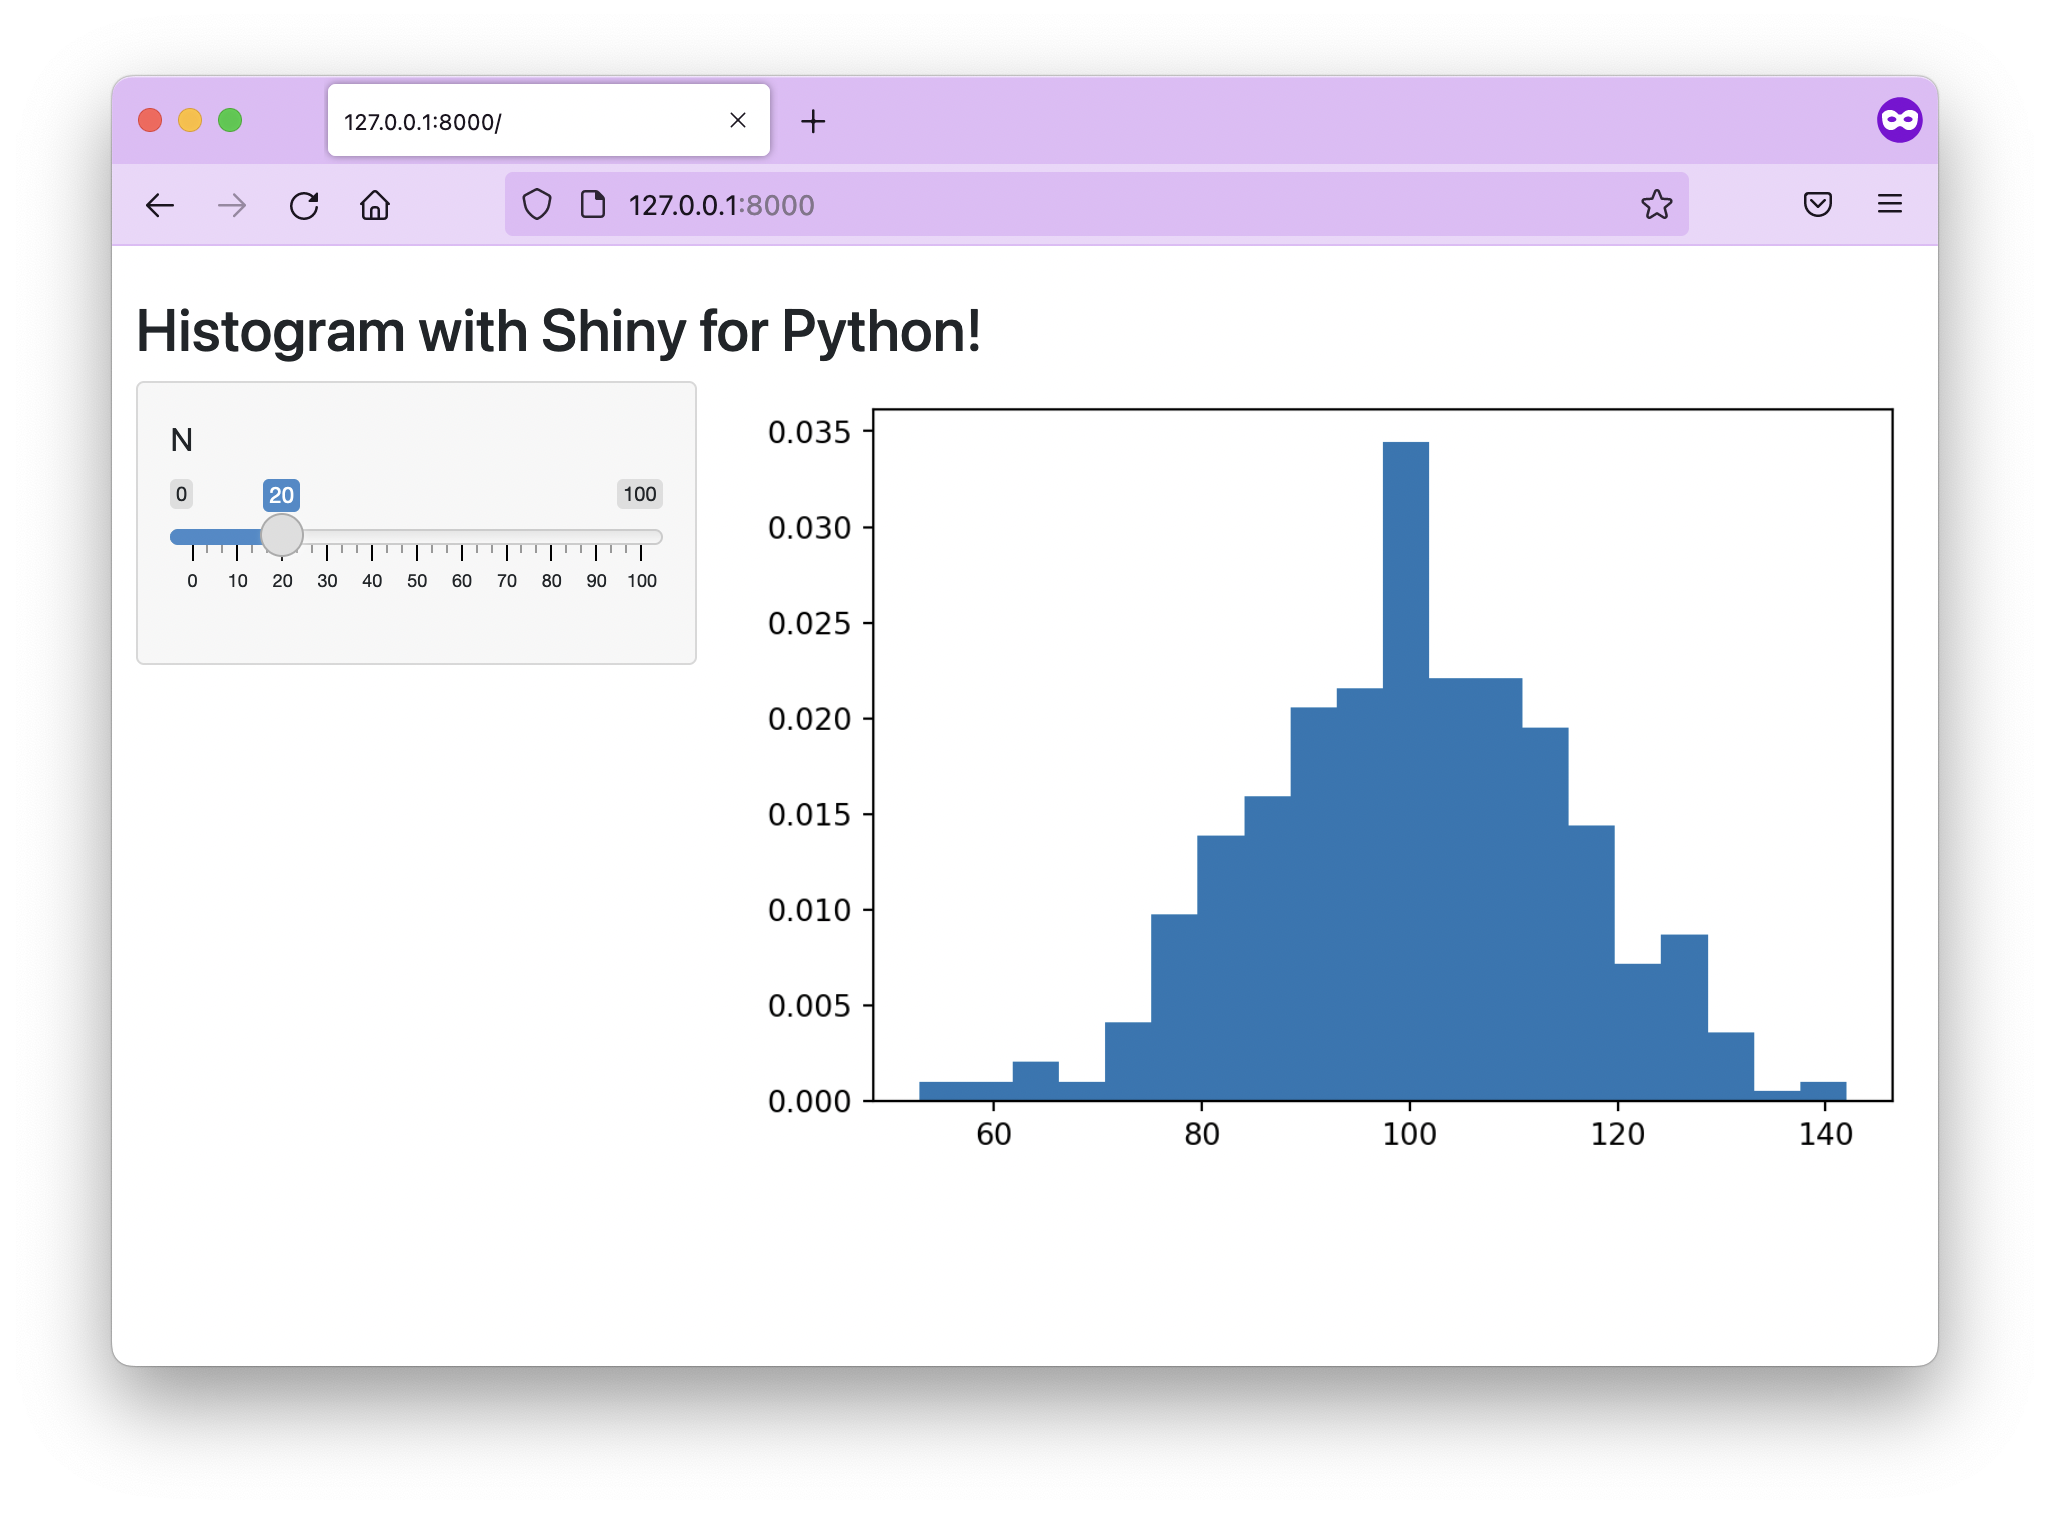
You'll see the new app with a plot that looks very similar to the classical R hello Shiny app:
The Dockerfile
If you look at the printout after launching the app, you'll notice that Shiny is using Uvicorn under the hood. This is a common way of containerizing apps using FastAPI deployments.
Let's see what goes into the Dockerfile:
- use the official
python:3.9parent image - create the
/home/appfolder and set anappuser with appropriate non-root permissions - install requirements before copying the app – this is to best utilize caching when still iterating on the app
- copy the rest of the
appfolder, i.e. the app itself - expose the 8080 port and define the
uvicorncommand
FROM python:3.9

# Add user an change working directory and user
RUN addgroup --system app && adduser --system --ingroup app app
WORKDIR /home/app
RUN chown app:app -R /home/app
USER app

# Install requirements
COPY basic/requirements.txt .
RUN pip install --no-cache-dir --upgrade -r requirements.txt

# Copy the app
COPY basic .

# Run app on port 8080
EXPOSE 8080
CMD ["uvicorn", "app:app", "--host", "0.0.0.0", "--port", "8080"]
Next, we can build the image. Define your own image name and tag:
export IMAGE=analythium/python-shiny:0.1

docker build -t $IMAGE .
Test the app running inside the container with docker run:
docker run -p 8080:8080 $IMAGE .
Go to http://127.0.0.1:8080 in your browser and check.
Push to the docker registry with docker push $IMAGE.

Shinylive
Shinylive is an experimental feature (Shiny + WebAssembly) that allows applications to run entirely in a web browser, without the need for a separate server running Python.
The point of Shinylive is not really to be served via Docker, but rather as static assets. Still, there might be cases when containerizing Shinylive seems like a good idea. When for example all the rest of the stack is using Docker and we don't want a file server besides that.
If this did not deter you, let's create the simplest Shiny app again inside the live folder:
shiny create liveAdd a live/requirements.txt file with the following contents
Shinylive will be installed on its own, no need to include it, just use your requirements from a non-live app:
# live/requirements.txt
shiny
The Dockerfile follows the pattern borrowed from the static R Markdown deployment using a multi-stage Docker build:
- install requirements + Shinylive
- copy the app
- build the Shinylive assets in the
sitefolder - copy the
sitefolder into a minimal image alongside the OpenFaaS watchdog and serve
FROM python:3.9 AS builder
WORKDIR /root
COPY live/requirements.txt .
RUN pip install shinylive
RUN pip install --no-cache-dir --upgrade -r requirements.txt
COPY live app
RUN shinylive export app site

FROM ghcr.io/openfaas/of-watchdog:0.9.6 AS watchdog

FROM alpine:latest
RUN mkdir /app
COPY --from=builder /root/site /app
COPY --from=watchdog /fwatchdog .
ENV mode="static"
ENV static_path="/app"
HEALTHCHECK --interval=3s CMD [ -e /tmp/.lock ] || exit 1
CMD ["./fwatchdog"]
You should be able to build, test, and push the Docker image:
export IMAGE=analythium/python-shiny-live:0.1

# Build
docker build -t $IMAGE .

# Test, visit http://127.0.0.1:8080
docker run -p 8080:8080 $IMAGE

# Push
docker push $IMAGE
The app at http://127.0.0.1:8080 in your browser should look like the one we began with: a slider and a text output showing the double of the slider input value.
Conclusion
We covered how to containerize Shiny for Python applications with dynamic or static Shinylive versions. This newly gained Docker power opens the door for deploying the app to various platforms via the Docker image. These options include Heroku, the DigitalOcean App Platform, Fly.io, Docker Compose, or ShinyProxy. And for the experimental Shinylive apps, just host it anywhere (GitHub pages, Netlify, etc.) as static files.
Deploying a single instance of a Shiny app, however, is not the same as deploying multiple instances. Load balancing between these instances of the same app could prove difficult. We'll revisit the pitfalls of scaling Shiny apps in a subsequent post. Get notified about new posts by signing up for the newsletter.
Further readings
- Get started with Shiny for Python
- Shiny for Python docs and examples
- Shiny for Python YouTube playlist
Docker images referenced in this post that you can docker pull:
analythium/python-shiny:0.1analythium/python-shiny-live:0.1